Deploying Qualys Scanner Appliance
It's time to deploy the Qualys scanner appliance in our home lab environment. At the main page that is presented after logging into the Qualys community environment, there is an option for configuring a Scanner Appliance. On the right side of this option there is a link to download a virtual scanner as well.
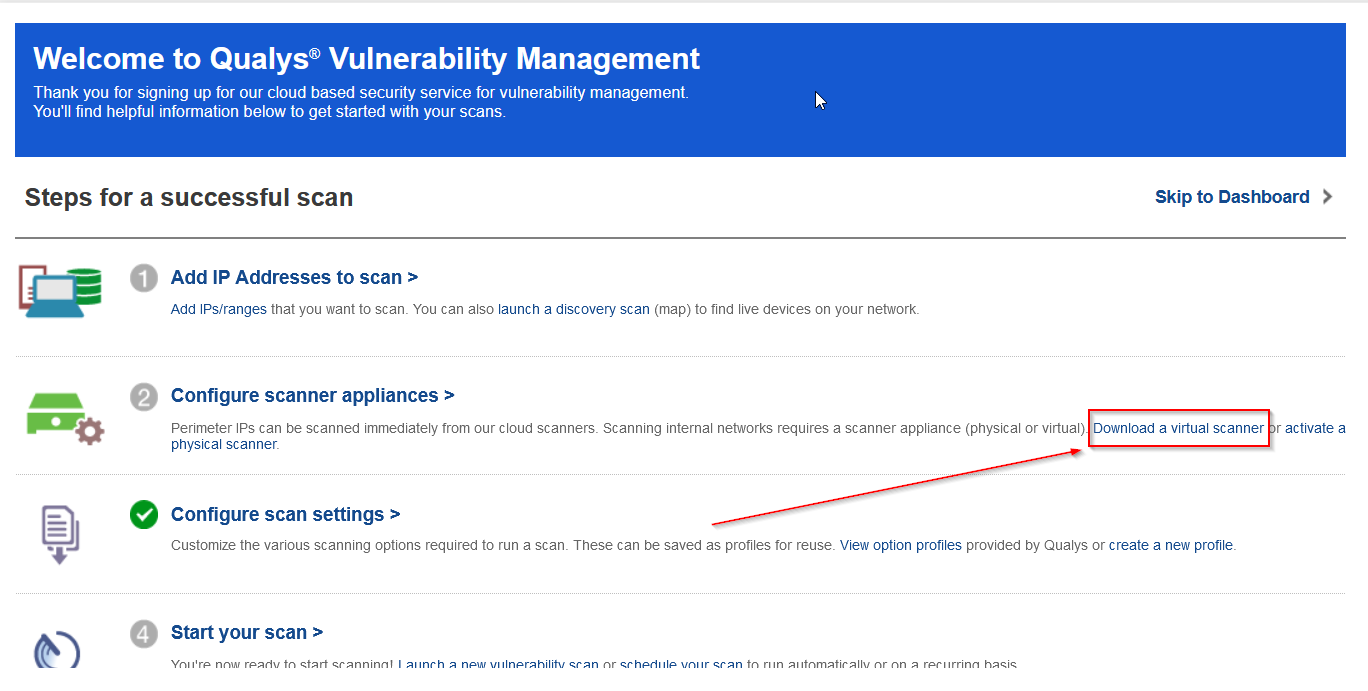
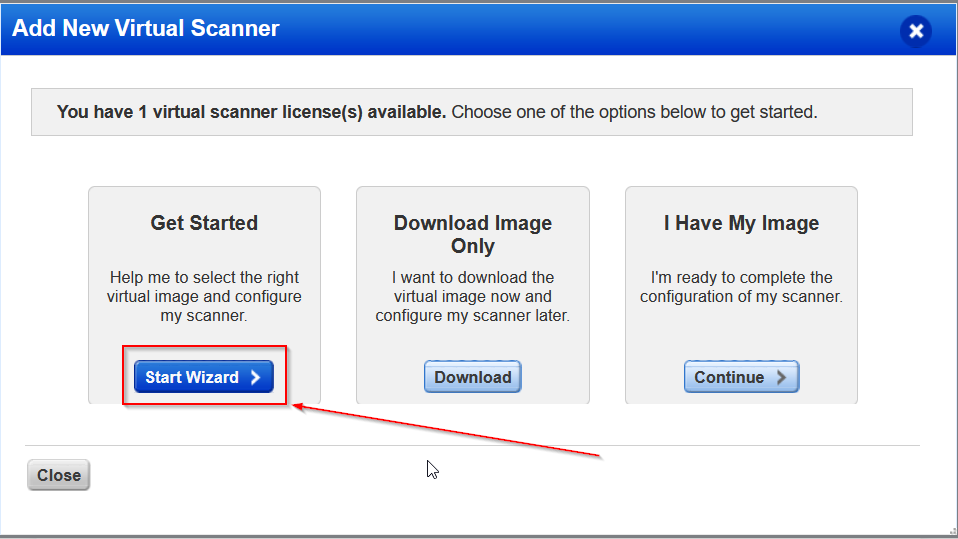
Clicking on "Download Virtual Scanner" we are prompted with some options. I went ahead and started the wizard, as I have not setup any scanning appliances yet in my community edition instance.
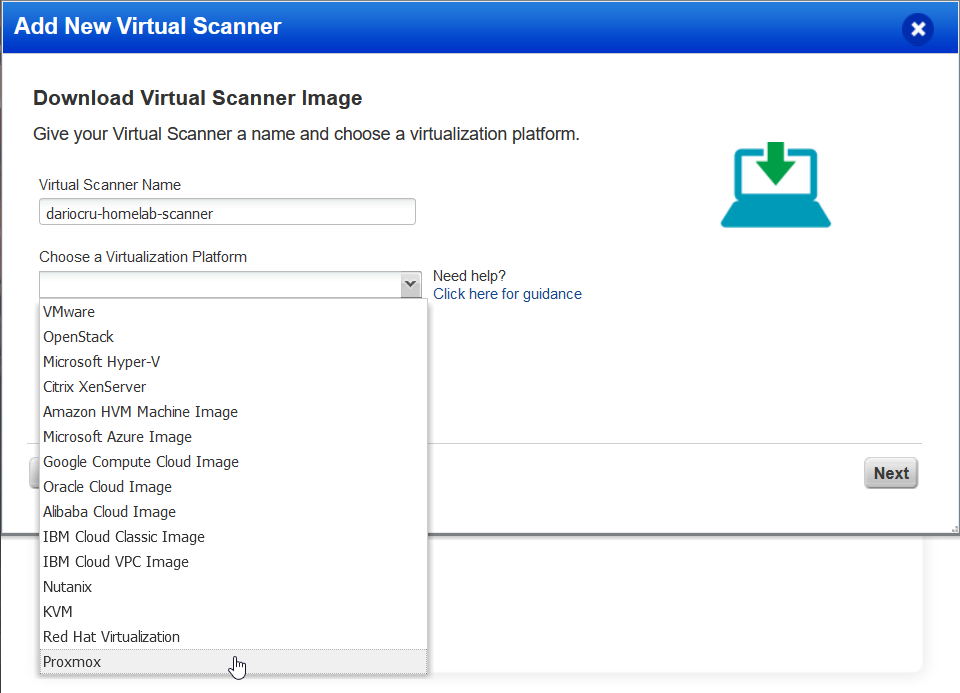
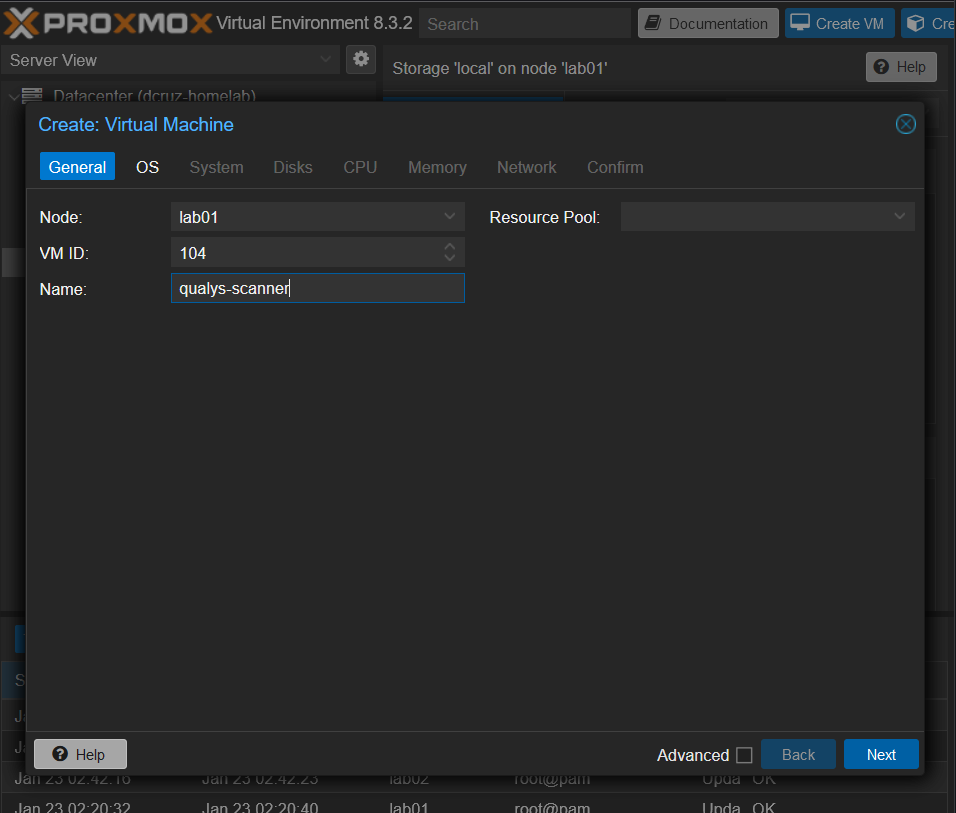
Following the steps in the wizard, I gave my virtual scanner the name of dariocru-homelab-scanner and chose the correct platform for the image which, in my case is Proxmox.
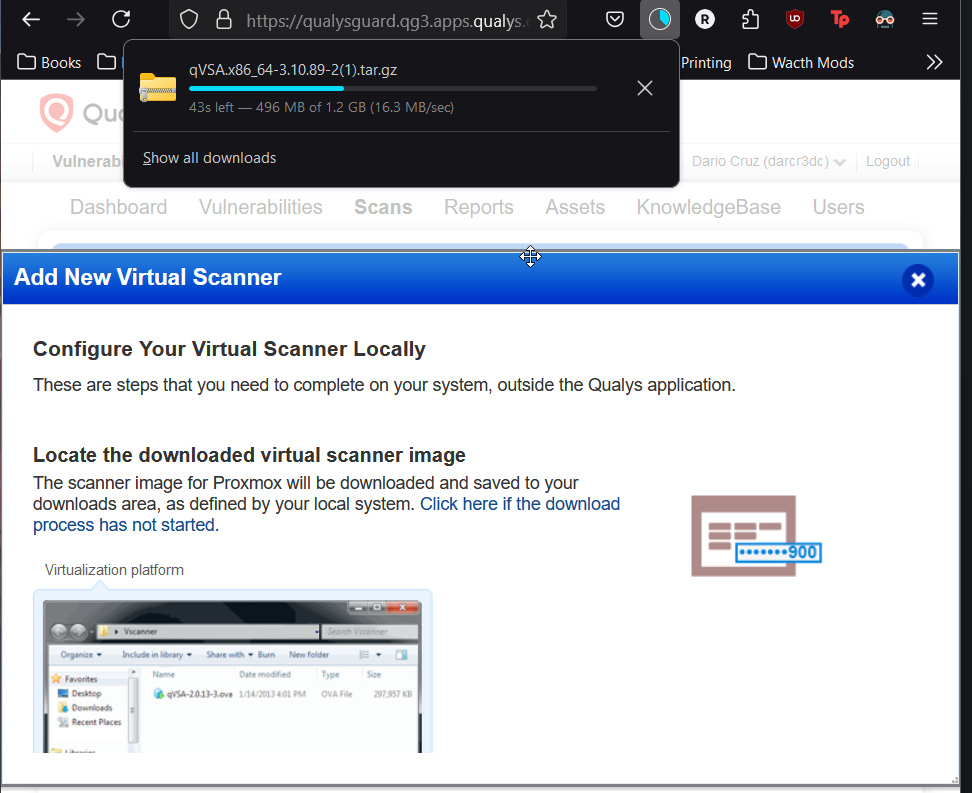
After selecting the options and hitting next, the download for the Quays Virtual Scanning Agent images starts.
Implementing Qualys Scanner in Proxmox
The images file for Proxmox is a .qcow file type, which is a QEMU image file. The image file is inside of a tar.gz archive so it will need to be extracted before use. The Qualys website has some documentation on how to deploy the image to a Proxmox implementation, this can be found here.
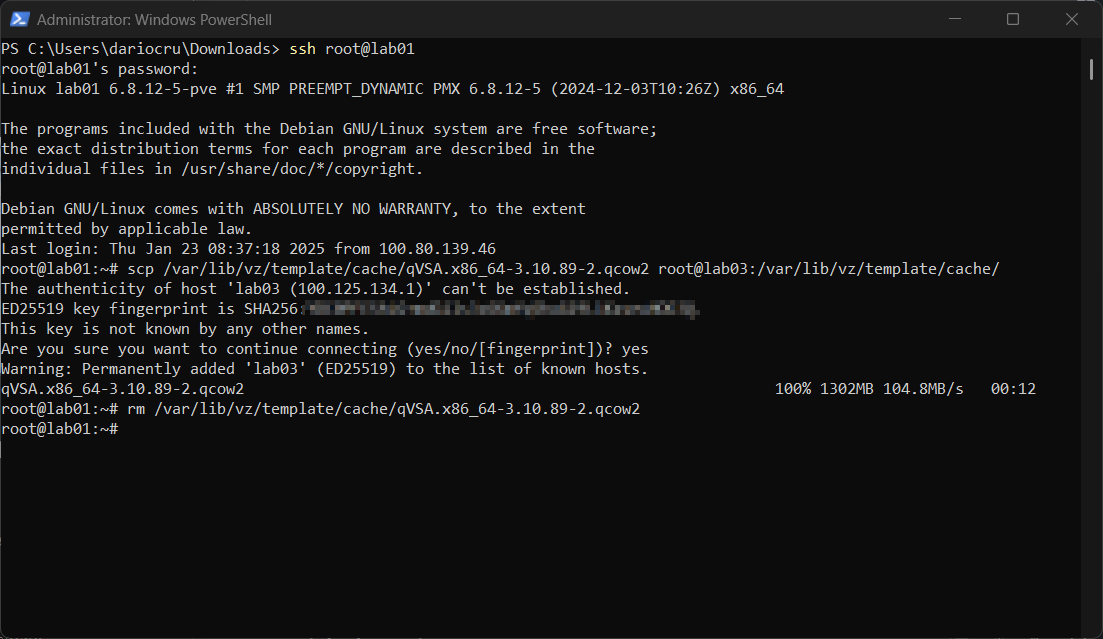
Following the steps in the documentation, I extracted the image file out of the archive and proceeded to transfer the file via SCP protocol to my Proxmox node lab01 which will be hosting the VM for the scanner appliance. All of this can be done via admin enabled PowerShell.

Now back at the Proxmox web interface, I made a VM and noted down the VM ID, as stated in the documentation.
Importing the Qcow2 Image
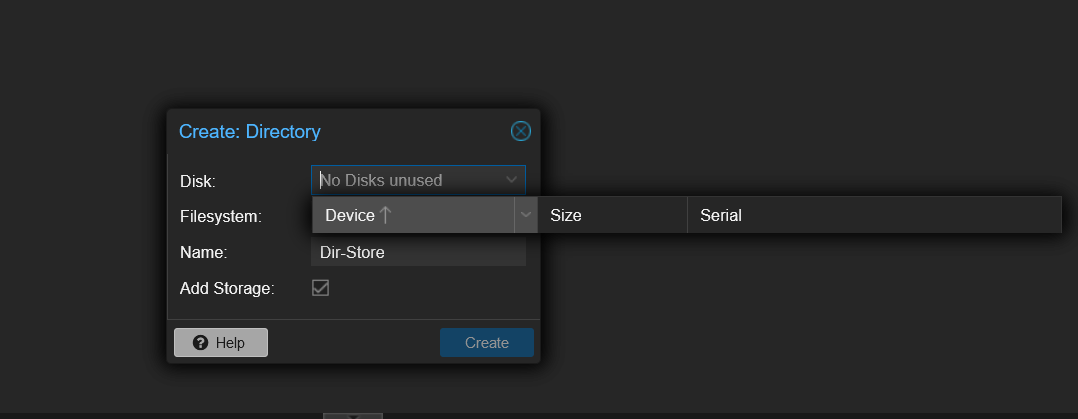
Okay so here is where I deviated from the Qualys documentation. I attempted to add the image to the VM with the settings I applied but, I was using primarily LVM & LVM-Thin storage for my VMs so far. What I needed to do to import the file was to create Directory type storage. You see, Proxmox VMs and Containers can be provided storage at file-level or at the block-level. LVM & LVM-Thin are block-level storage solutions thus, the need to make the change over to file-level storage.
Storage Issues
More issues arose as I attempted to create the directory storage we needed. On my Proxmox nodes I formatted my VM storage disks as LVM-Thin and had them use all the storage that the physical drive had, leaving no run for any other storage types to be made. 😔
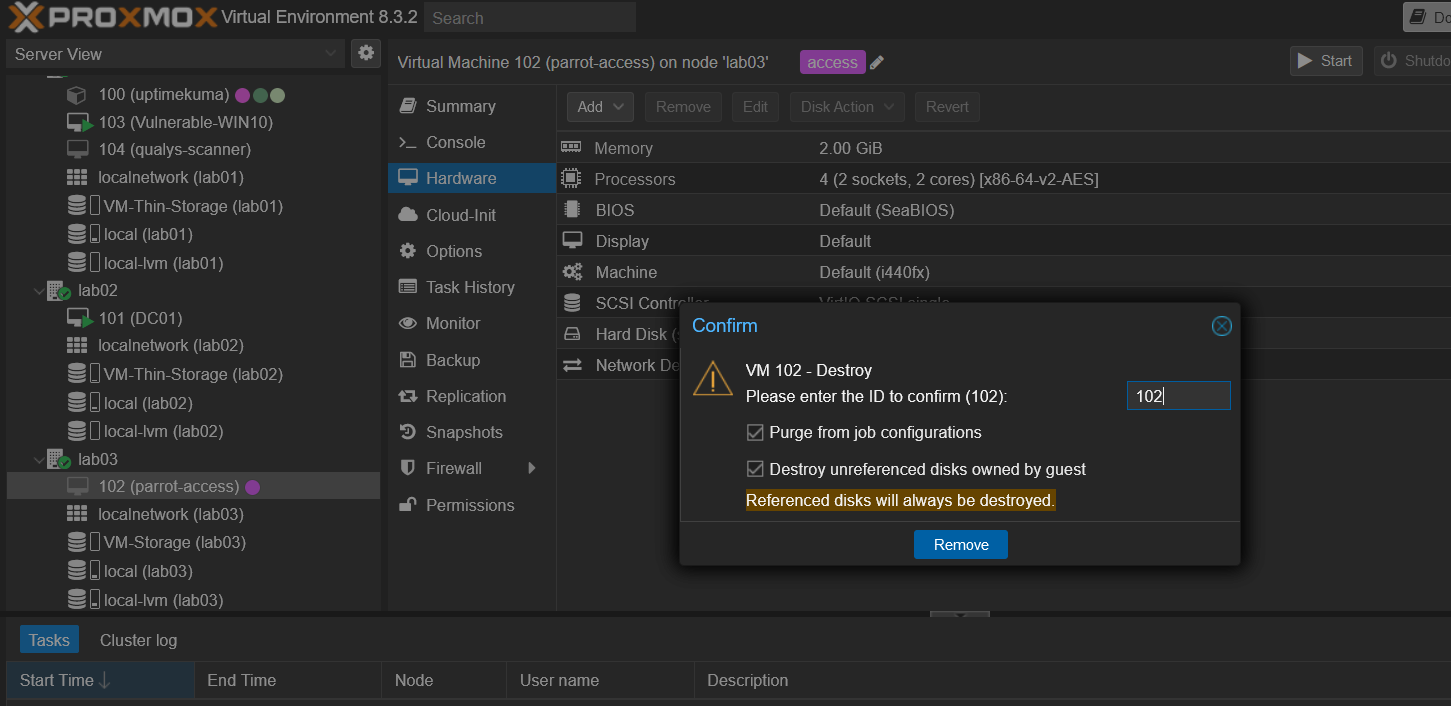
To get around this issue I decided to format the SSD installed on node lab03 the node itself was just running a single ParrotOS VM, which I was using as an access VM to configure PFsense during the initial setup of the lab.
Here I am deleting the VM.
Here we are deleting the LVM-Thin storage.

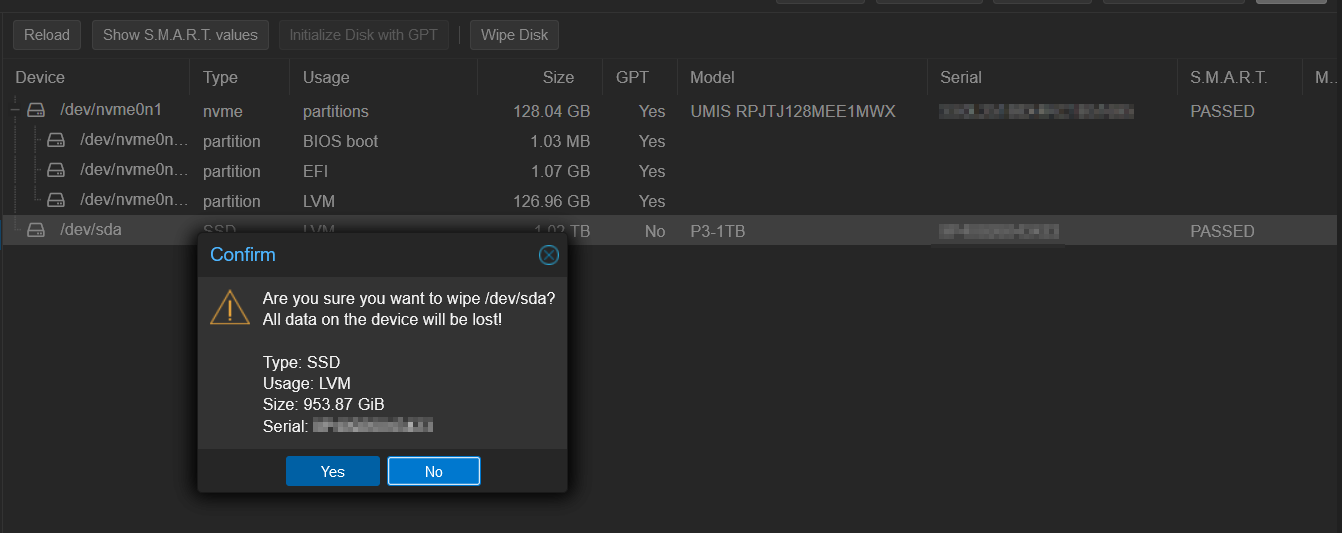
We also need to wipe the physical drive to prep it for new storage pool creation as well.
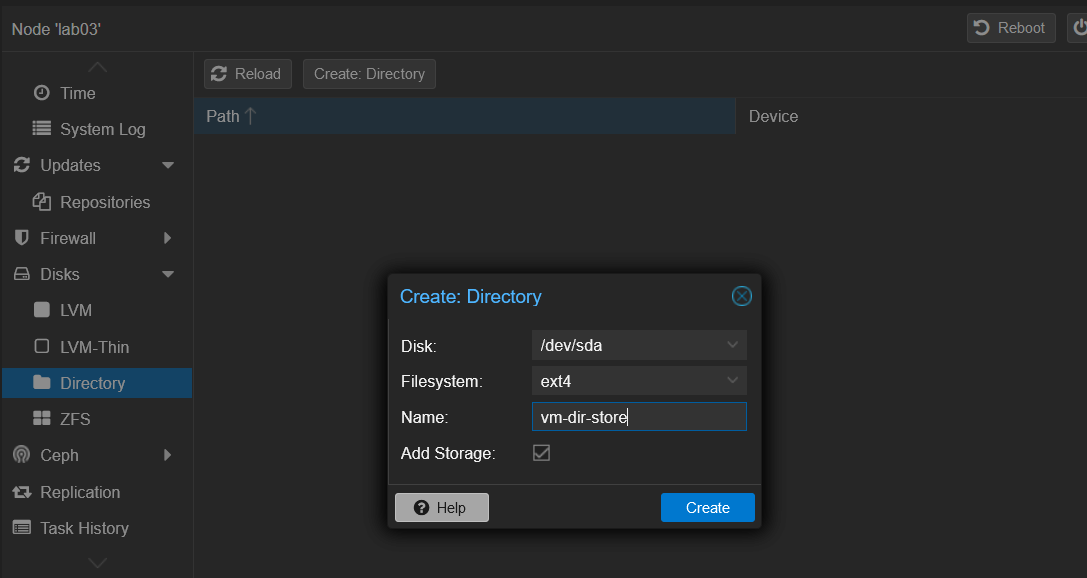
Now lets create the Directory storage.
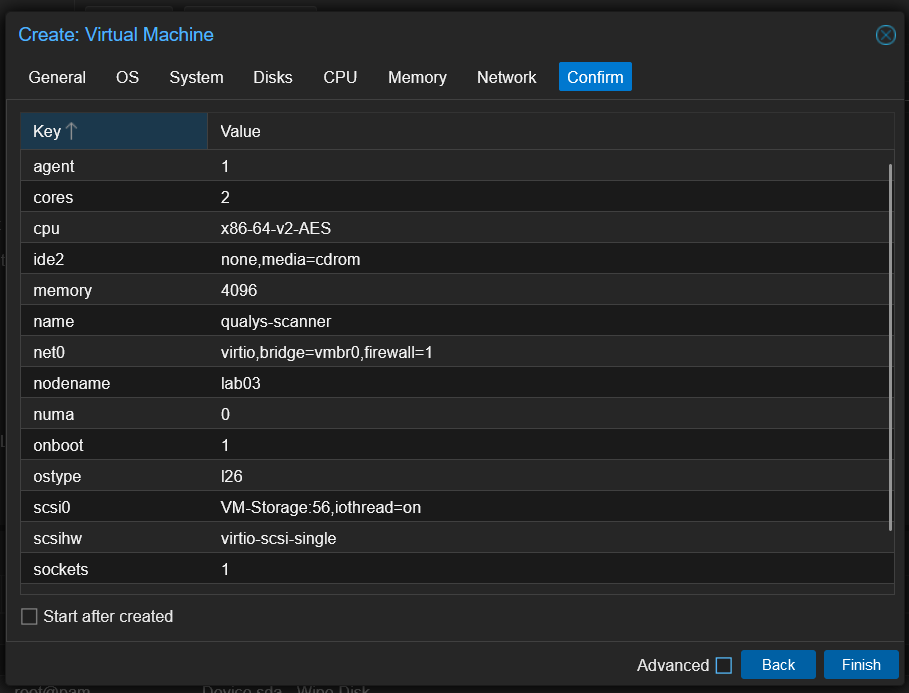
With that created I proceeded to recreate the VM with the settings in the Qualys documentation.
With the VM created I needed to transfer the .Qcow2 image downloaded from Qualys from node lab01 to node lab03 where our VM resides. I ssh'ed into lab01 and used SCP to transfer the image file over. I then deleted the file from lab01 just to keep things nice and tidy.
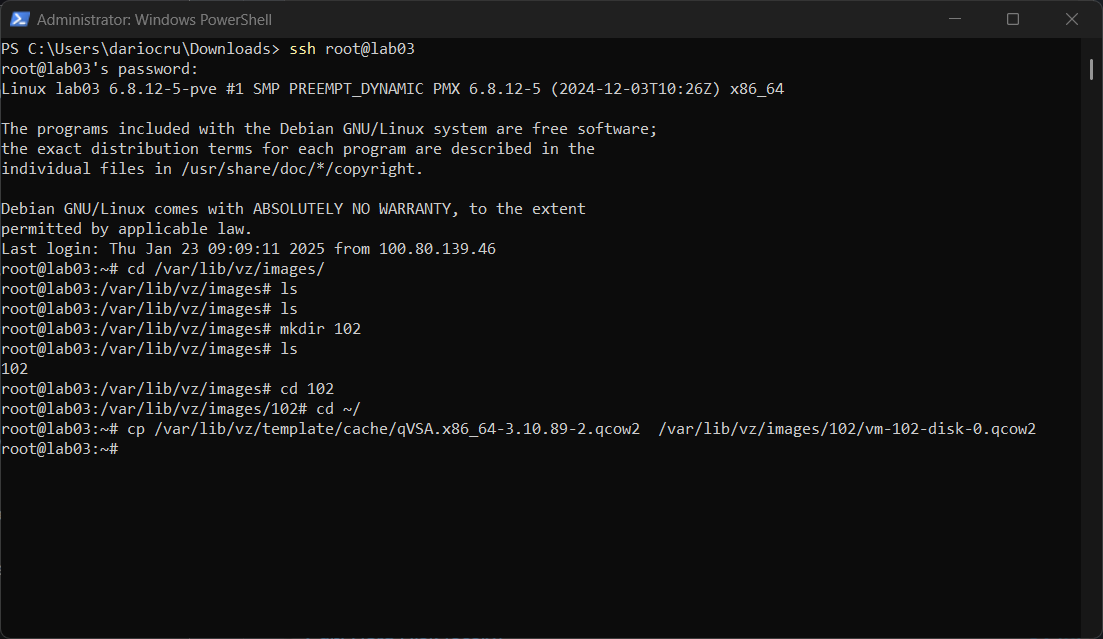
Reading the documentation, we then have to copy the image file to the images folder of the VM we created, in my case I did not have a folder for my VMID, which is 102 so I created it and copied the image file there.
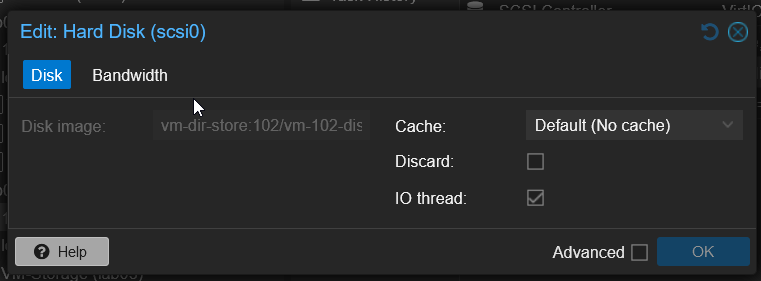
Looks like making the directory worked, after checking the web interface I can see that now for the hard disk, it points to the file that we moved to the images folder.
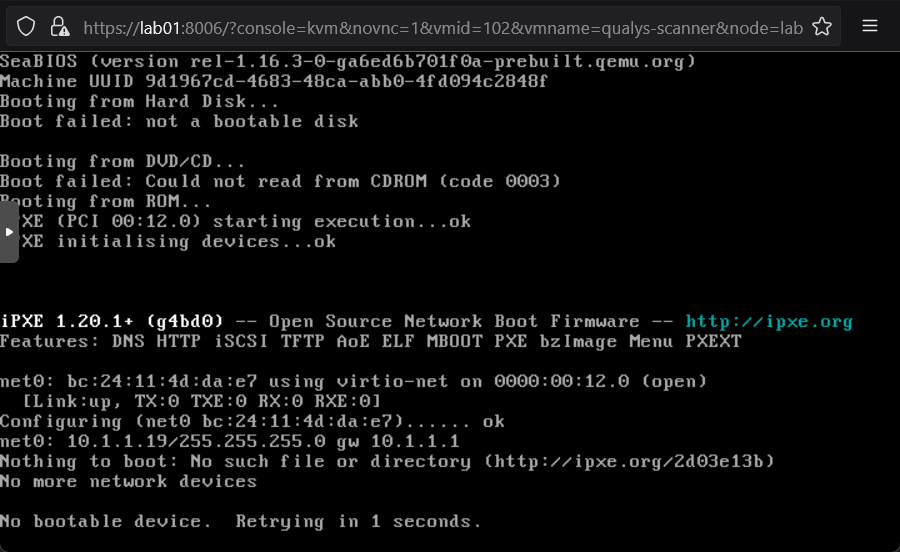
And unfortunately this did not completely solve all of the issues. Starting up the VM, I was met with boot looping from PXE boot to the BIOS screen, meaning that the image was not being read and the OS was not being detected and booted into.
Found a command after doing some research that storage paths and settings were stored in /etc/pve/storage.cfg I used cat to spit the contents of the file into the terminal. I found the path to the directory storage we created and found the VM image there.
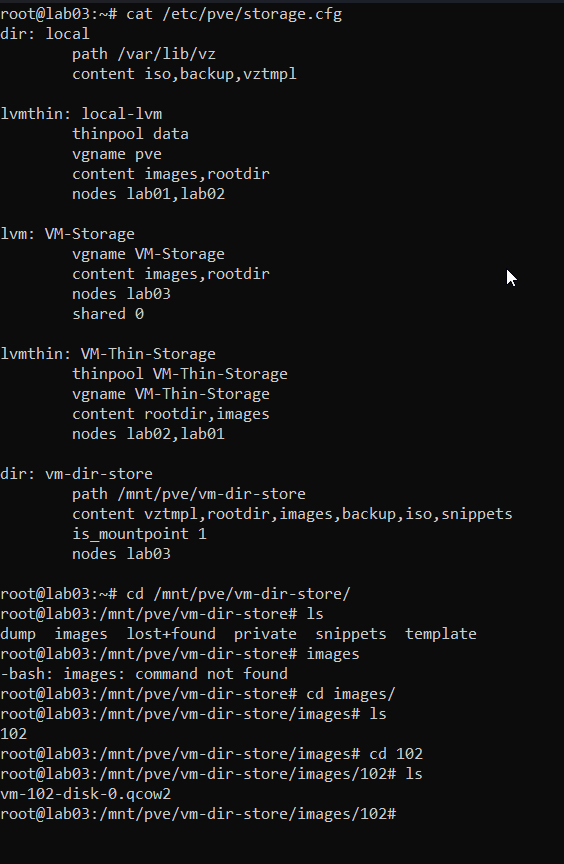
I proceeded to move the file that we placed in /var/lib/vz/102/images to the proper location at /mnt/pve/vm-dir-storage/images/102 overwriting the image that was already there.

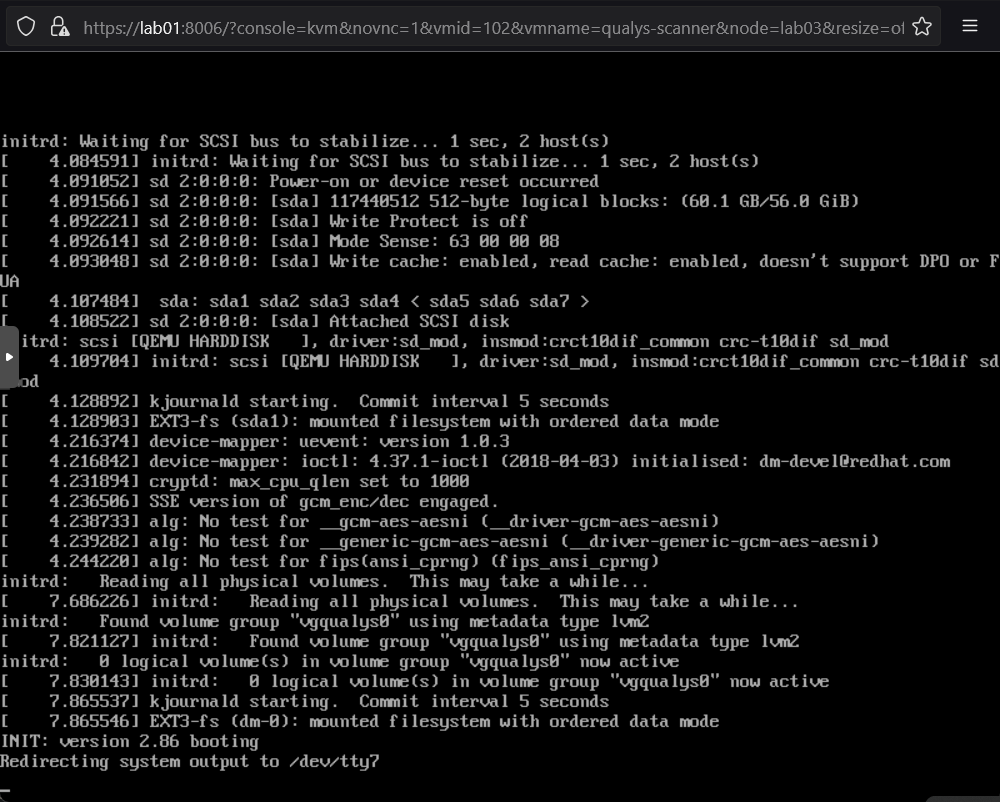
And now it boots.🚀🚀🚀
Configuring Qualys Scanner Appliance
Once the VM is fully booted I was met with this screen asking to proceed to "Personalization" settings.
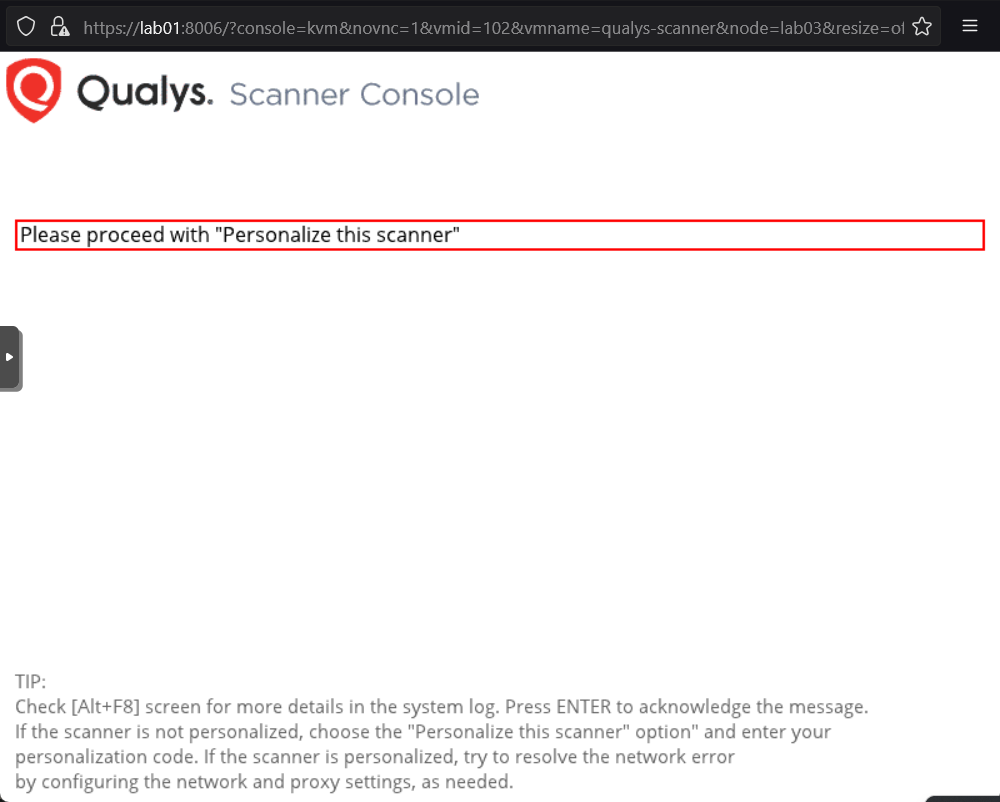
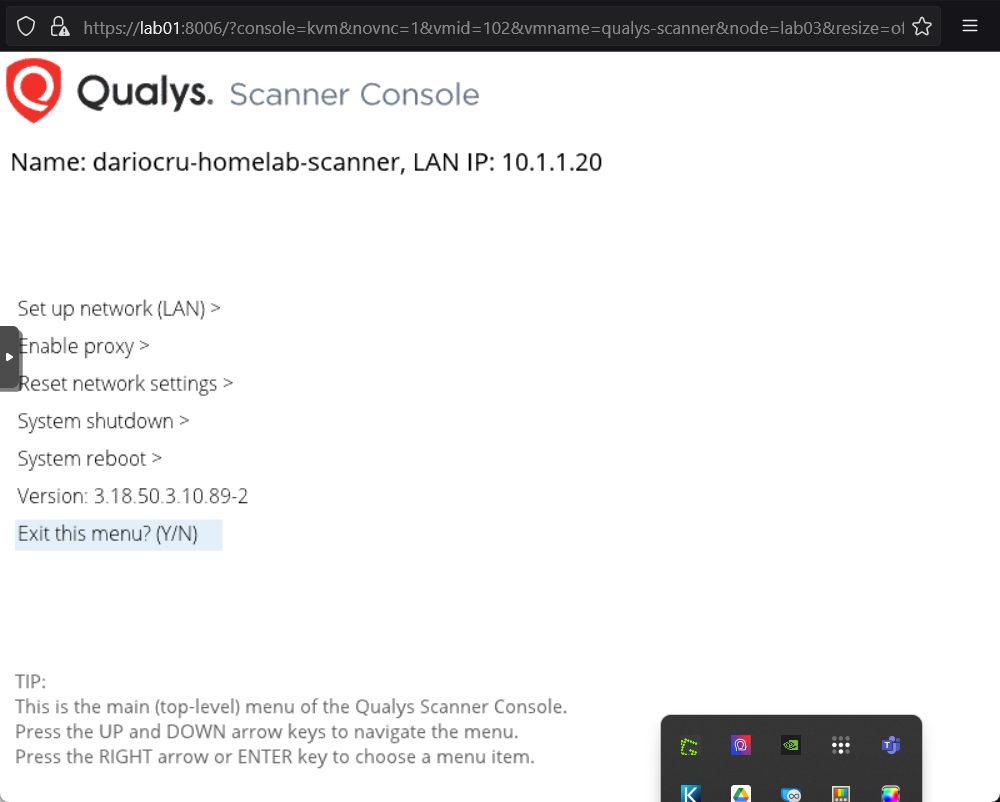
Hitting enter on this screen took me to configuration settings for the scanner. First thing to do was to input a "Personalization Code". This code can be found one the Qualys dashboard under Appliances.

The Qualys Scanner software then goes through a configuration and update process.

After the process finishes we are brought back to the configuration page. In my case the Qualys Scanner software negotiated an IP address from the PFsense DHCP service, for now this is okay for our needs. For extended testing though, it should be paramount to configure a static IP.
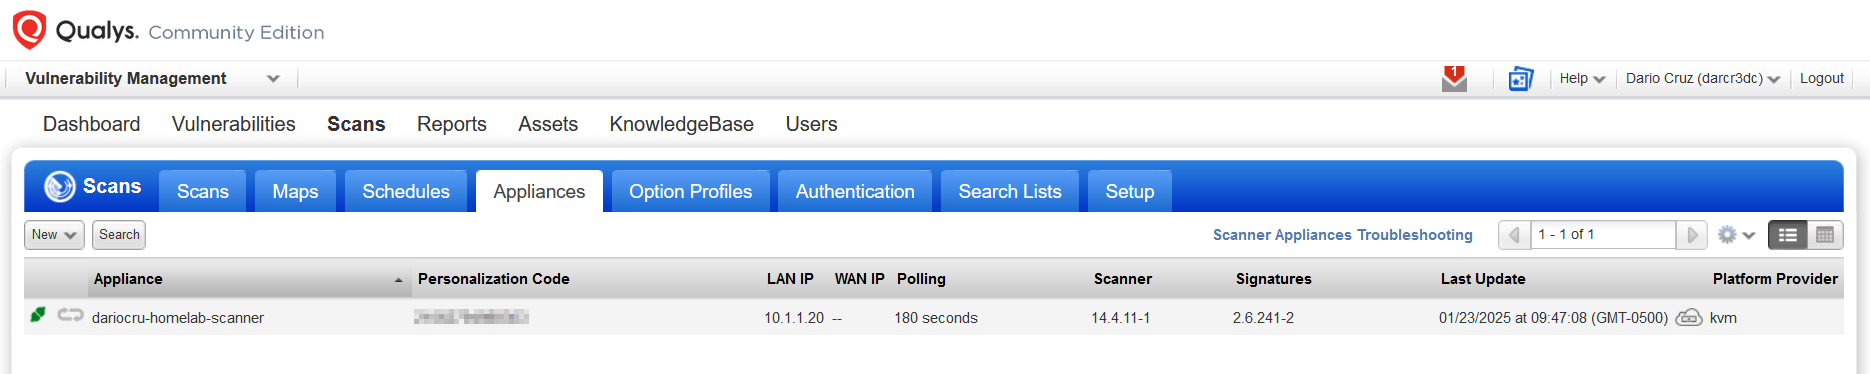
Back at the Qualys dashboard, we can now see that our scanner appliance is successfully communicating back to Qualys's servers.
We now have an active scanner appliance on our isolated home lab network. We can now configure Qualys to scan specific IP addresses of hosts/endpoints on our network and scan for vulnerabilities.
Vulnerability Scanning with Scanner Appliance
Now it is time to actually scan our vulnerable machine using our newly configured scanner appliance. In order to get the scan to work properly we will need to provided credentials so that the scanner appliance can login and complete scan tasks and provide reports on vulnerabilities found.
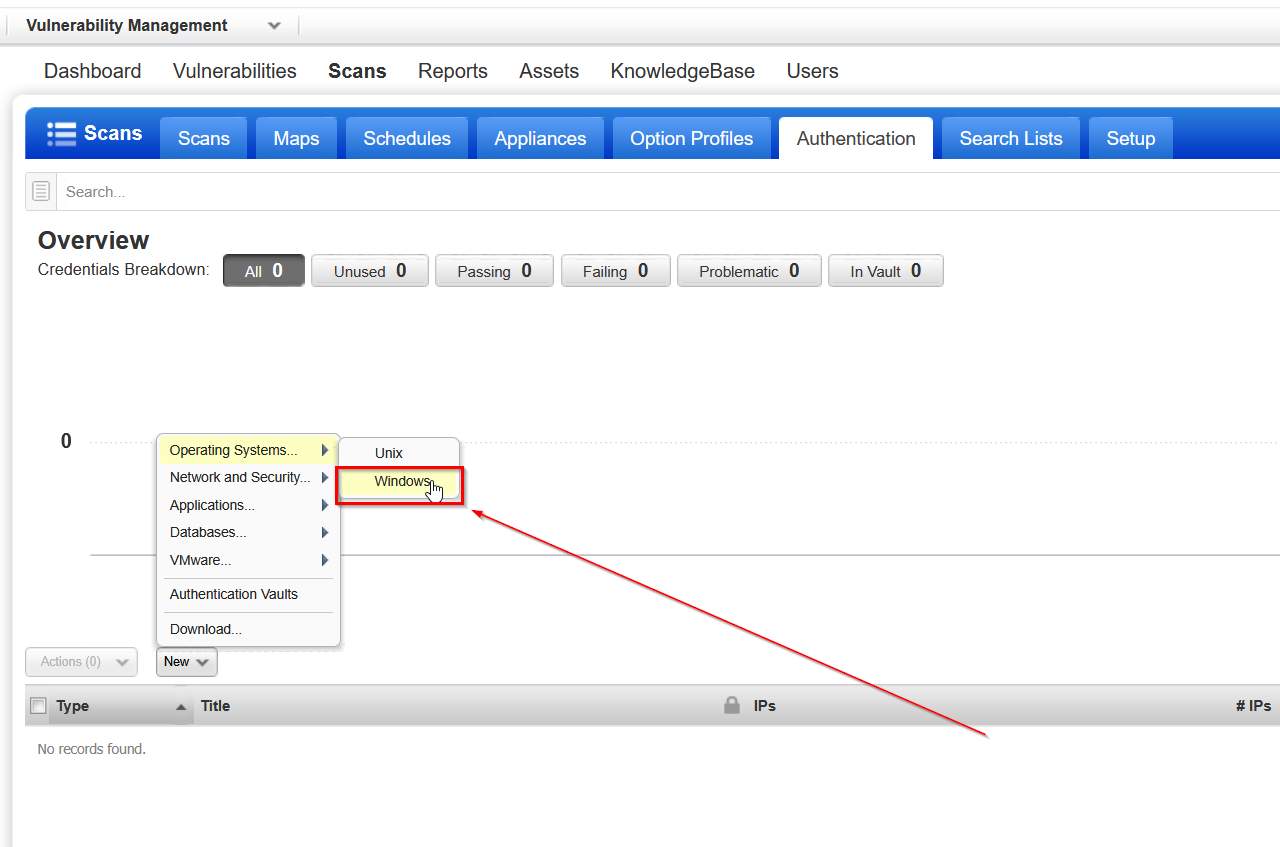
To do this we navigate back to the Qualys dashboard > Vulnerability Management > Authentication. In Qualys scanner appliance scans can be completed with authentication or without, without authentication is called an unprivileged scan. When authentication credentials are provided, specifically admin accounts, the scanner will have privileges to complete deeper scans of the target host.
Authentication Credentials
At the authentication page we need to add a new set of credentials, this can be done via the New dropdown menu. In or case we will select Operating System > Windows and proceed on to the next step.
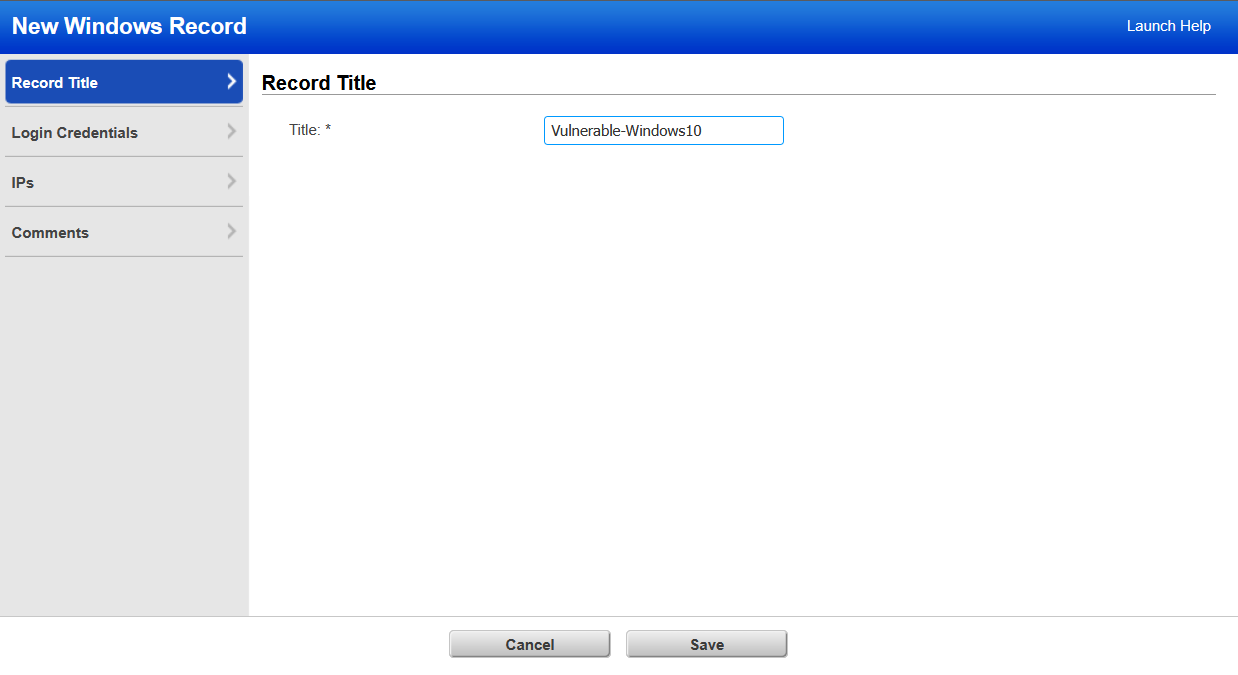
In the new browser window that appears we have a few options to configure, first of which is to give our set of credentials a name, I've named mine Vulnerable-Windows10.
Next will be the login credentials. Note that by default the credential settings will be set to domain. For my use cause, and since I have not setup and joined our vulnerable Windows 10 machine to a domain, I will be using the local authentication method and leaving the settings to their defaults.
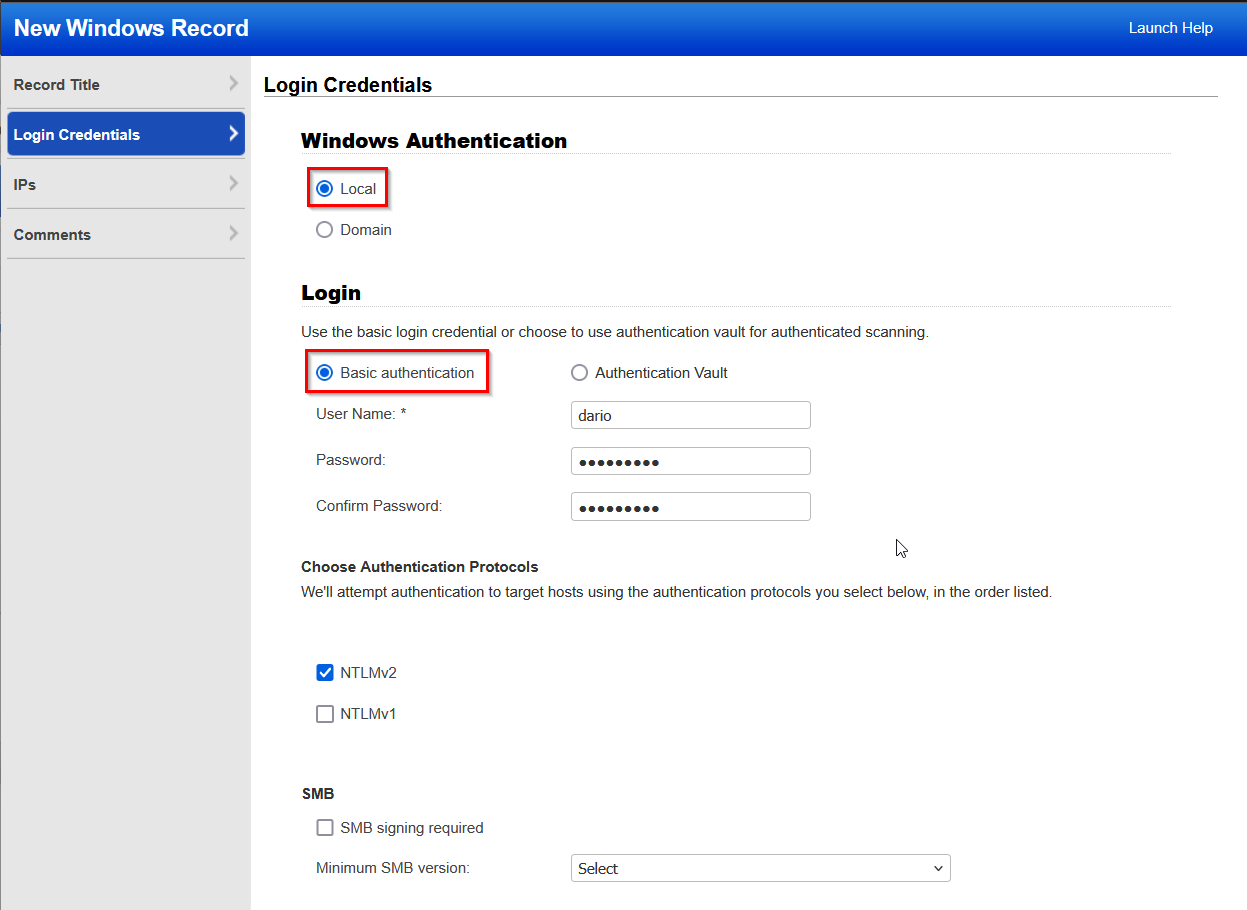
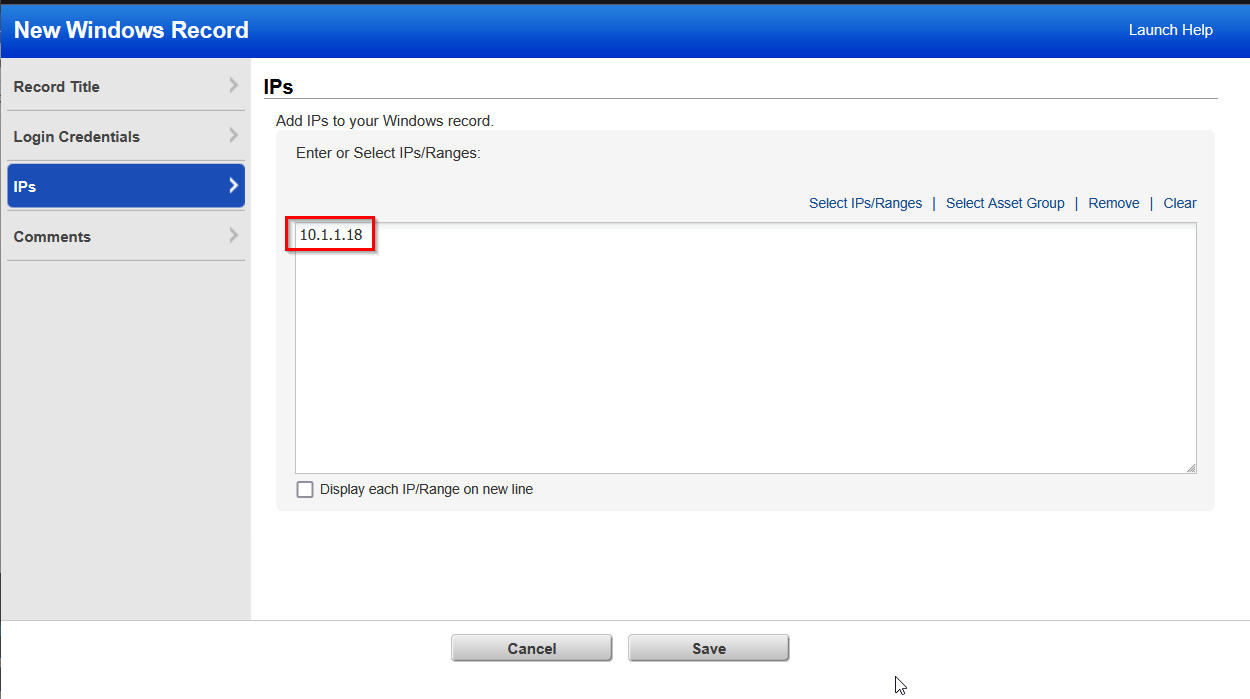
Providing the login credentials to the machine, I moved on to the next setting which was IP address information. My machine currently has the IP address of 10.1.1.18. Added the IP address and then added some comments to clarify what the credentials are for, I then saved the information.
And now we have a set of credentials for our machine defined in Qualys.

Initiating Scanner Appliance Scan
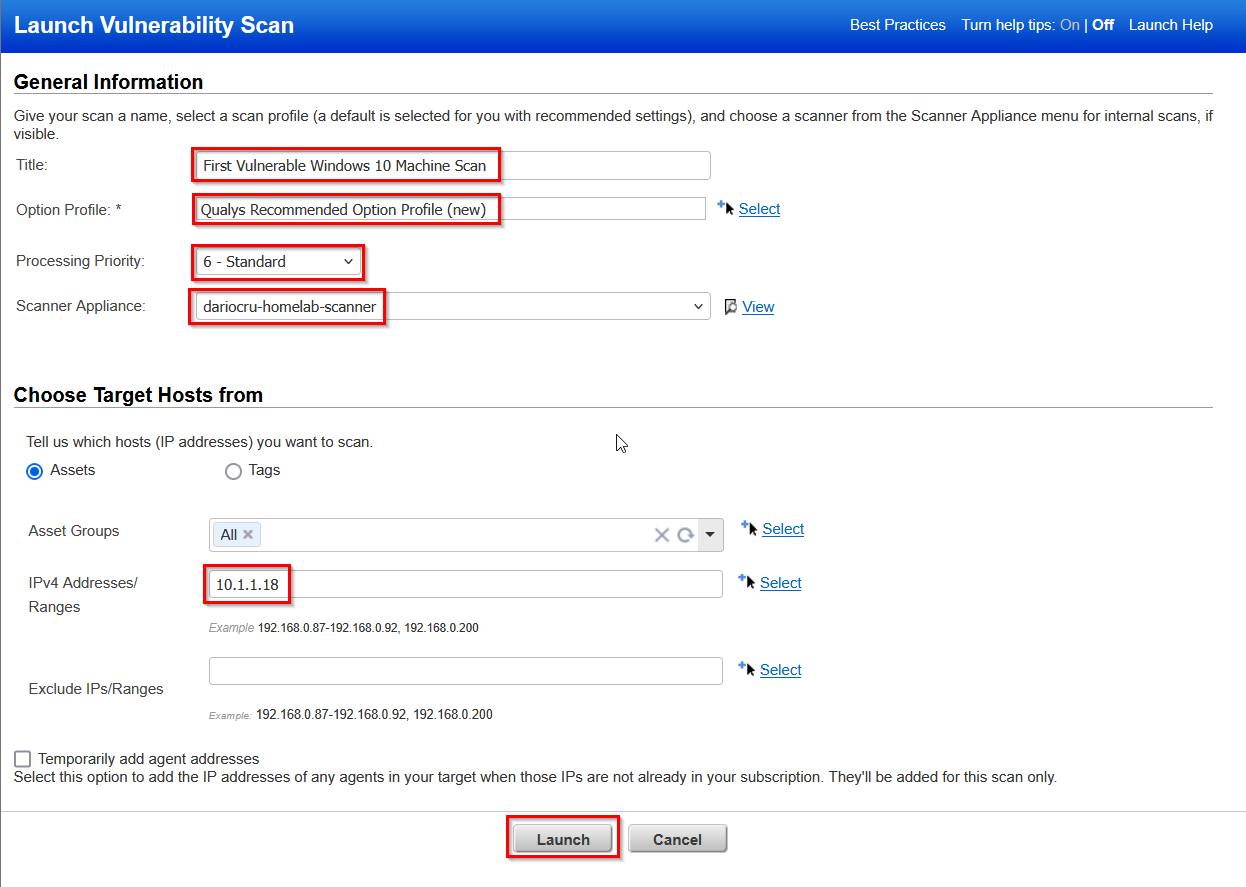
It's finally time to actually scan our Windows machine with our scanner appliance, to do so navigate to Vulnerability Management > Scan from here we click New > Scan and proceed on to the pop-up browser window and configured the scan.

In the window that popped up we have a set of scan settings. I filled out all of the options, using all of the items that we have configured so far, our scanner appliance, IP of our Windows machine, scan priority and the type of scan to be run. In this instance I will use the "Qualys Recommended Option", just to see what information in provides after the scan.
I initiated the scan and gave it some time run through it's process. Going back to the Qualys dashboard and looking at the scan section, we can now see that our scan is in the queue to be completed by the Scanner Appliance.

Note that when the scanner appliance is actually running the scan, the status of the scan will change to "Running" and also clicking on the scan entry, will bring up more status information regarding how far the scan has progressed.

 Once the scan is finished a report will be generated and emailed to the address on the account profile. Going back to scans and clicking on the report, we are presented with a report of Qualys' findings.
Breaking Down the Results
Looking at the findings we can see that a total of 28 vulnerabilities where found by the scanner appliance. Vulnerabilities are broken down into severity levels which allow for prioritization of the most critical findings. We can also see that found vulnerabilities are categorized.
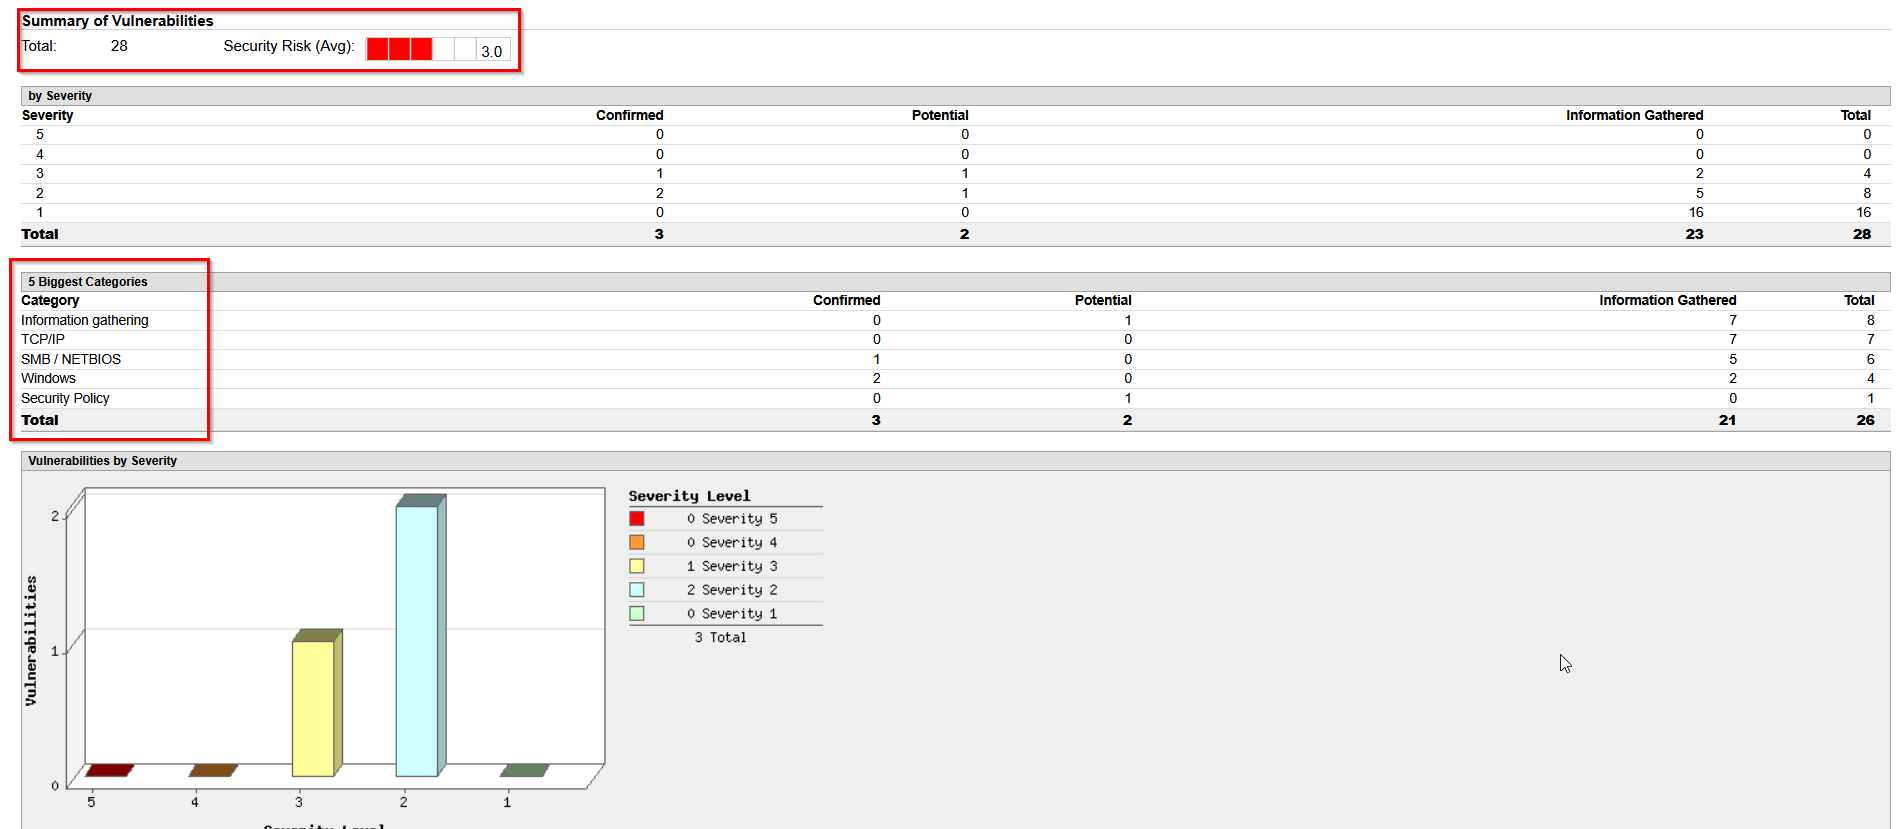
Scrolling down to the report we are provided with more detailed information about the vulnerabilities found.
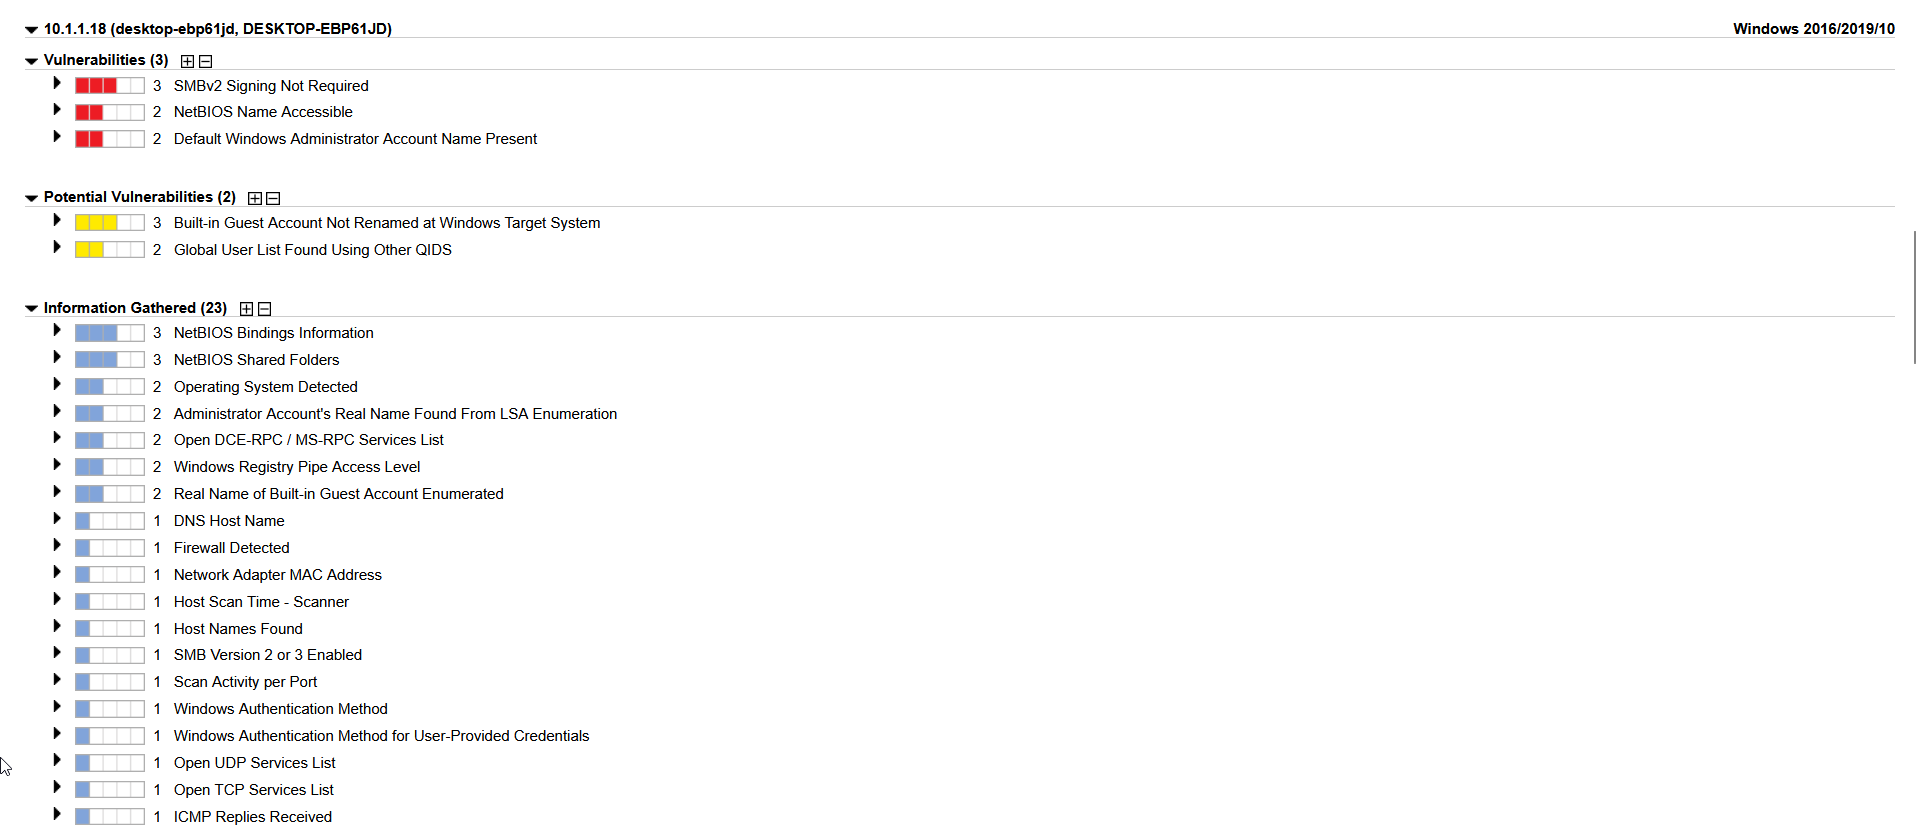
We have 3 vulnerabilities that are confirmed, SMBv2 issue with signing not being required on the Windows OS, NetBIOS name being accessible, and a vulnerability about the default Windows Admin account name being present.
There is also a list of potential vulnerabilities that have been found, the windows Guest account not being renamed and an issue pertaining to the Global User list. As well as some information gathering entries. Later on in this project we will compare and contrast scanning with a Qualys scanner appliance vs installing a Qualys Cloud Agent on the same vulnerable machine. For now lets move on to setup and installation of said cloud agent.